SAMPLE
COLLECTING AND PREPARATION OF SAMPLE AND PATIENT
This section deals with the information
that is required to be documented on the laboratory request form and the
specimen bottle or container, prior to the analyses of samples. The laboratory
has a number of different request forms. These are used for different
laboratory analyses as outlined below. It is important that the correct form is
supplies for a particular test.
|
(Name of the laboratory) |
||
|
Ordering physician |
Specimen details |
|
|
Name- |
Signature- |
Type of specimen- |
|
Phone number- |
Date- |
Site of specimen- |
|
Patient Details |
||
|
Name- |
Age- |
Collection date and time- |
|
Phone number- |
Gender Male |
|
|
|
Female |
Test requisition |
|
Address- |
Clinical history - |
1 |
|
|
|
2 |
|
|
3 |
|
|
|
4 |
|
|
|
5 |
|
|
Red top |
|
bnADDITIVE |
non |
|
Mode of action |
Blood clots and the serum is
separated by centrifugation |
|
Users |
Chemistries, Immunology and serology,
blood bank |
|
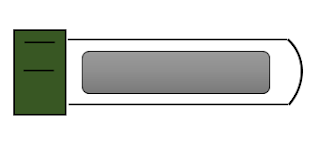
Green top |
|
ADDITIVE |
K3EDTA |
|
Mode of action |
Forms calcium salts to remove
calcium. |
|
Uses |
Hematology (CBC) and blood bank;
requires full draw- invert 8 times to prevent clotting and platelet clumping |
|
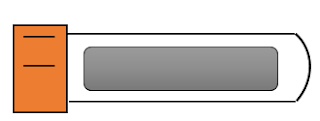
Orange top |
|
|
ADDITIVE |
Potassium fluoride and sodium EDTA |
|
Mode of action |
Ant glycolytic agent preserves
glucose up to 5 days. |
|
uses |
Glucoses, requires full draw |
|
Pink top |
|
ADDITIVE |
Sodium citrate |
|
Mode of action |
Forms calcium salts to remove calcium |
|
uses |
Coagulation test (prothombing time).
Full draw required. |
PATIENT PREPARATION
The quality of results from laboratory
testing depends greatly on the proper collection and handling of the specimen
submitted for analysis.
Blood collection procedure
Venipuncture
1. 1. Site preparation at early morning
a) Cleaning of the collection site
• A clean surface including
two chairs (one for the phlebotornist and the
• A hand wash basin with
soap, running water and paper towels;
b) Use of personal protective clothing
and additional protective equipment
c) Wash your hands before wearing the
gloves
d) Have all blood collecting equipment
ready and available
2. 2. Procedure for drawing blood
- Identify the patient by asking patient's name, age and requested test.
- Assess the patient's physical
disposition (i.e. diet, exercise, stress, basal state).
- Check
the requisition form for requested tests, patient information, and requirements
- Select a suitable site for venipuncture.
- Although the larger and fuller median cubical
and cephalic veins of the arm are used frequently, the basilica vein on the
dorsum of the arm or dorsal hand veins are also acceptable Venipuncture. Foot
veins are a last resort because of the higher probability of complication
• Extensive scars from burns
and surgery - it is difficult to puncture the scar tissue
• In case of mastectomy, the
vein should be selected as indicated below as test results may affected because of lymphedema.
4. Prepare the equipment, the patient and the puncture site.
Equipment
- · Collection Tubes - The tubes are
designed to fill with a predetermined volume of blood.
The plastic stoppers are color coded according to the additive that the tube container and various sizes are available. Blood should never be poured from one tube to another can have different additives or coatings
- Needles - The gauge number indicates the bore size: the larger the gauge number, the smaller the needle bore. Needles are available for use with a syringe, single draw or butterfly system.
- ·
Tourniquet - Wipe off with alcohol and
replace frequently
- ·
Alcohol Wipes -70% isopropyl alcohol.
- ·
Povidone-iodine wipes/swabs - Used if
blood culture is to be drawn.
- ·
Wool sponges - for application on the
site from which the needle is withdrawn.
- ·
Adhesive bandages/tape-protects the
venipuncture site after collection
- · Needle disposal unit - needles should
NEVER be broken, bent, or recapped. Needles should be placed in a proper disposal
unit IMMEDIATELY after their use.
- ·
Gloves can be made of latex, rubber,
vinyl, etc.: worn to protect the patient and the phlebotomist.
- ·
Syringes - available in various volumes.
5. Perform the venipuncture.
- • Approach
the patient in a friendly, calm manner. Provide for their comfort as much as
possible, and gain the patient's cooperation.
- ·
Identify the patient correctly.
- • Properly
prepare labels, indicating the test(s) ordered.
- ·
Verify the patient's condition.
Fasting, dietary restrictions, medications, timing, latex allergy and medical
treatment are all of concern and should be noted on the lab requisition if
there is any problem.
- ·
Position the patient. The patient
should sit in a chair, lie down or sit up in bed. Hyperextend the patient's
arm.
- • Apply
the tourniquet 3-4 inches above the selected puncture site. Do not place too
tightly or leave on more than 2 minutes (and no more than a minute to avoid
increasing risk for hernoconcentration). Wait 2 minutes before reapplying the
tourniquet.
- ·
The patient should make a fist without
pumping the hand.
- ·
Select the venipuncture site.
- ·
Prepare the patient's arm using an
alcohol prep. Cleanse in a circular fashion, beginning at the site and working
outward. Allow to air dry.
6. Collect the sample in the
appropriate container. Order of draw
- • Blood
culture bottle
- • Tube
with 3.2% sodium citrate (Coagulation tube)
- • Gel
separator tubes with clot activator
- • Serum
separator tubes (Red top)
- • Heparin
tube with dark green top
- • EDTA
tube
- • Tube
with sodium fluoride and potassium oxalate
7. Label the collection tubes at the bedside or drawing area.
- A properly labelled sample is essential so that the results of the test match the patient. The key elements in labelling are:
- ·
Patient's name.
- ·
Auto generated number.
- ·
Both of the above MUST match the same
on the requisition form
- ·
Requested test(s)
- ·
Promptly send the specimens with the
requisition to the laboratory.
Microbiology
Ensure
the following information is fixed to each specimen container:
- Patient's first and last name
- Auto-generated patient number
- Source and type of specimen
- Date and time of collection
Multiple
specimens requiring individual diagnosis should be placed in separate
containers to be accessioned separately. If specimens are not labelled, or are
mislabeled, a repeat Specimen may have to be collected resulting in a delay in
processing. Exceptions will be made when invasive procedures are required for
the specimen collection.
Urine
Specimens
All
urine specimens received in the laboratory must have, at a minimum, the
following information fixed to the container (not lid): patient's first and
last name, Auto-generated patient number and date and time of collection. 24 h
or other timed collection must have in addition to the above: start and stop
dates and times of collection. Deliver urine specimens to the laboratory as
soon as possible after collection to maintain cellular and chemical stability.
Some specimens require special or immediate handling after collection.


Post a Comment